Tuesday, March 3, 2015

Prepping an RV for Winter Living


Before we started living in our RV full-time, my husband just drained the tanks and water lines, added antifreeze, plugged in a dehumidifier, covered it and parked it over the winter.  We tried using it a couple of times on camping trips in the colder months and from those experiences knew our RV wasn't well-insulated for living in it year round. 

Winterized water line in the RV Park
To keep the water lines from freezing we followed the suggestions of the RV park staff.  The hydrant and waterlines were wrapped with roof de-icing cable and then covered with foam pipe insulation.


The roof and gutter de-icing cables were recommended over the heating tape and cables that are usually used by home-owners for metal plumbing pipes

Foam pipe insulation on the RV water line 
To give the hydrant a little extra protection from the cold, a plastic 5-gallon bucket was placed on top upside down.


Since the Pacific Northwest usually has fairly mild winters, the temperature doesn't often go below much below freezing for more than a day or two.  So we kept an eye on the weather forecast and only turned on the heating cables when the temperature was predicted to be below freezing because we didn't really like how warm it kept the cold water coming from the tap.  That worked fine until we went away to visit relatives for 5 days over Thanksgiving.   We checked the forecast before we left and the low temperatures at night were predicted to be in the mid 30s and daytime highs in the 40s. The Seattle area is notorious for having inaccurate weather forecasts, so we should have known better.  We did take the precaution of shutting off our water heater and the water at the hydrant.  A couple of days after we left the temperatures dropped lower than we expected and we came home to our 5th wheel to find an icicle hanging from our kitchen faucet - darn- didn't get a photo!  We were able to unthaw the pipes quickly and fortunately there was no damage.

Thermostat for the roof de-icing cable
We did some research and bought a fairly inexpensive little thermostat that is made for use with the de-icing cable.  We plug the de-icing cable into the thermostat unit and it turns on the cable automatically when the temperature drops below 50 degrees.  So far it has worked fine and now our cold water isn't warm all of the time.  Unfortunately it looks like this product is no longer available which is too bad because it worked great.


We knew our vents were also a source of heat loss, so we bought some vent pillows to insulate them better.   We did notice that they need to be removed periodically to prevent condensation and  mold growth.  

Insulation for RV vents
We just wait for a fairly sunny day every 3-4 weeks to remove the pillow, wipe away any moisture and let the pillow and vent dry for a few hours.


The windows in our RV are single pane so we knew they were causing a huge heat loss and were also forming a lot of condensation.   We bought about 4 of these inexpensive window film insulation kits on sale.  We used my hair blow-drier to heat the film to shrink it.  The window film made a huge difference both in reducing the amount of cold drafts and the amount of condensation on the windows for very little cost.

Film window insulation

We did need to buy an additional roll of the adhesive tape that is used to attach the edges of the film to the windows.


The film wasn't that difficult to install and is virtually invisible on the windows.  I took this close-up of the only window where I could find a little visible wrinkle. 

Film insulation on the inside of an RV window
These few items really helped to make our 5th wheel more warm and comfortable over the winter months.


Wednesday, February 18, 2015

Sh!tter's Full - RV Holding Tank Problems


One afternoon as I came in the door when I arrived home after work, I heard my husband's voice from somewhere in the bowels of the RV, "Don't use the bathroom!"   He knows I usually head in that general direction after my hour-long commute home on the bus.  When I asked him what was wrong, he answered "shitter's full" quoting one of the scenes from the movie Christmas Vacation that we've joked about many times since we started thinking about living in our RV.


Our 5th wheel is pretty basic and doesn't have a black water tank flushing system. When we hooked up our sewer pipe to the RV Park sewer system we just left the valve to the tank open to the sewer pipe to drain continuously.  Apparently that may not have been a good idea - another newbie mistake. Now the sewer line was clogged and the tank was full.


There is something very ominous about looking into a toilet with a full holding tank.  Fortunately the RV Park has a nice shower facility available to guests which includes toilets, so we schlepped up the road and made use of the park facilities for the rest of the day and night while we searched the internet to look for ideas of how to unclog our toilet.


RV Park Shower and Bathroom
There were all sorts of after-market sewer flushing systems out there available on Amazon.


But of course, even with Amazon Prime and free 2-day shipping we really didn't want to wait two days to fix our sewer problem.  There are were a couple of places that sell RV supplies about 25 miles away, but several hardware stores that are much closer.  So first thing the next morning my husband stopped at the hardware store to look for some ideas before driving all the way to the nearest RV specialty supply business.   He saw a ten foot length of 1/2" ENT flexible blue conduit  for about 3 bucks and decided to buy some to use to make a snake.

Corrugated flexible 1/2" ENT Flex Conduit-  end sealed with duct tape
He left the black water tank valve open to the sewer pipe outside.  Then he went inside the RV, wrapped one end of the tube with duct tape to seal one end, shut off the water, opened the toilet flush valve and snaked the tubing down the hole a couple of times.

Using a homemade snake to unclog the RV waste tank
Success!  The clog was broken up and the tank emptied.  Fixed for less than $5.  He then filled a bucket with water and flushed the system by pouring a couple of gallons of water down the toilet.  We have since left the black water tank valve closed and only open as necessary when the tank gets about 2/3 full.  After opening the valve to empty the tank, he always flushes it with a bucket or two of water.  He then shuts the black water tank valve again and adds a package of holding tank deodorant from the toilet.

 
We've had no problems with clogs in the 4 months since he started using this process.

Camping World


submit to reddit

Wednesday, February 11, 2015

Up in a Tree House at Treehouse Point


The Temple of the Blue Moon Tree House at Treehouse Point
Although I've always been fascinated with tree houses, perhaps my interest in tiny spaces has been rekindled by living full time in an RV for several months.  Another benefit to RV living is with a such a small place to clean and no garden to maintain, I've got more free time to spend having fun! I decided to sign up for a tour of the amazing treehouses at Treehouse Point Bed and Breakfast, where you can sleep in the trees. This unique tree house hotel is located near Fall City, Washington, a few miles east of Seattle.  Treehouse Point is the creation of Pete Nelson before he became well-known on the popular Treehouse Masters TV show.  Tours are available by reservation only through Brown Paper Tickets.

Where is Treehouse Point?


A rather obscure sign along the Preston-Fall City Road marks the entrance to Treehouse Point.


Treehouse Point Entrance Sign
Inside the entrance I made a sharp right turn and got my first glimpse of the charming craftsman-style office building and the parking lot.

Treehouse Point Office and Parking Lot
The tour I took had included a total of about 18 people and we were instructed by a sign to gather in front of the office no earlier that 15 minutes before the tour was to begin.
Treehouse Point Office
Inside the office it was verified that we were on the list for the tour and not surprisingly, since we would be climbing up into trees, we were all required to sign a liability release.


As the tour began we passed by the Nelson Treehouse Supply Company which sells tree house designs and the hardware for building a treehouse. The second floor office is where Pete Nelson works when he is not out of the office meeting with people who want a treehouse or filming the Treehouse Masters TV show.


The Temple of the Blue Moon Tree House at Treehouse Point

On this particular tour we were able to see all of the Pete Nelson tree houses in the order in which they were built, starting with the one named the Temple of the Blue Moon.

Inside the Temple of the Blue Moon Tree House
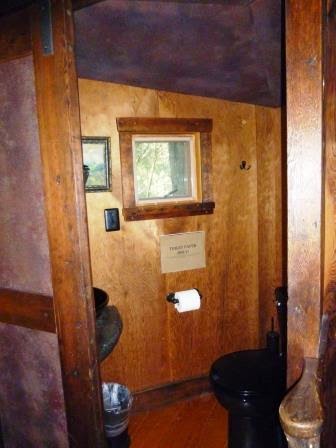
After crossing the suspension bridge I stepped inside to a surprisingly spacious room furnished with a table, bookcase and two leather armchairs in addition to the comfy bed.  Only one of the tree houses has its own bathroom with running water and traditional plumbing.  Some of the others have a composting toilet and all guests have use of shared bathroom/showers down on the ground.  The composting toilets are mainly for those middle of the night bathroom trips when it might not be convenient to go to the bathrooms on the ground.

Composting Toilet
We climbed a rustic spiral staircase around a western red cedar tree to see the Trillium, the next tree house on our tour.

Trillium Tree House at Treehouse Point

After arriving inside the Trillium the most impressive feature is a gorgeous two-story wall of windows on three sides.
Inside the Trillium Tree House
A ladder leads up to a loft where the bed is located.

Ladder to the loft in the Trillium tree house
A comfortable bed on the second floor loft looks out through the windows to views of the surrounding forest.  The trillium is really like a glass house with a total of 80 windows.


Trillium Tree House Bed
Our next stop was the Upper Pond tree house which is accessed with a ladder.  The rope and pulley under the roof overhang is used to pull up luggage.
Upper Pond Tree House at Treehouse Point
Upper Pond is the only tree house at Treehouse Point with more than one bed.  In addition to the main bed it has two upper bunks.

Inside Upper Pond Tree House at Treehouse Point
The Nest is smallest of the tree houses and as the name suggests, has a bird theme.
The Nest Tree House at Treehouse Point
After climbing the stairs, step inside a cozy little bedroom with bird decor that includes artwork of birds.

Inside the Nest Tree House
A staircase winding around the trees led us to the Bonbibi, our next destination.  A small deck was created underneath providing a place to sit and relax sheltered from rain or sun.

Bonbibi Tree House at Treehouse Point
The housekeeping staff had not yet finished making the bed when I visited, but it still looked like a cozy space with windows over the headboard and bookcases. 


Inside the Bonbibi Tree House
The newest addition and the last one on the tour was the Burl.  A bridge extends from the ground to the tree house built around a magnificent old Douglas fir tree that is over 200 feet tall.

The Burl Tree House at Treehouse Point

Inside there is a lovely sitting room with antique furniture and decor.

Inside the Burl Tree House

The Burl, like the Trillium, is two stories tall with a ladder to access the bedroom in the loft.  
Ladder to the Loft Inside the Burl Tree House
The bedroom loft has windows all around to enjoy the view in every direction.


The Burl is the only tree house at Treehouse Point that has a bathroom inside with running water.


The other bathrooms and showers are located in modern, clean buildings and shared by all guests.

Shared Guest Bathrooms at TreeHouse Point.
 I peeked inside one of the bath houses for guests.  It had the woodsy scent of cedar like the inside of a sauna!
Inside a Bath House at Treehouse Point
For weddings or other events Treehouse Point offers treehouse rentals of the entire facility with all of the tree houses and a meeting room.  The meeting room has a glass garage door can be opened to an adjoining large covered patio.

Treehouse Point Meeting Room
Another door from the meeting room opens to a covered deck with rustic tables and chairs overlooking a pond.
Outdoor Covered Deck at Treehouse Point

Sign Post at Treehouse Point
I really enjoyed the tour and was impressed with the craftsmanship and attention to detail that I saw in each tree house including the railings and stairs, woodcarvings on doors, use of recycled materials and antique furniture. I didn't share photos of everything to leave some surprises for anyone else who might want to take the tour.  Reservations are available through Brown Paper Tickets.